Step 1 - Network connecting
Once you received the remote you need to connect the interface to you wireless network. This only needs to be done once with the first use or after a change of the wireless network. This has to be a 2.4 Ghz wireless network!
Step 2 - Connection - Battery
Before requesting a service, it is important that the vehicle is parked in such a way that a good internet connection is possible and that the battery is sufficiently charged so that a good on-board voltage is guaranteed during the service.
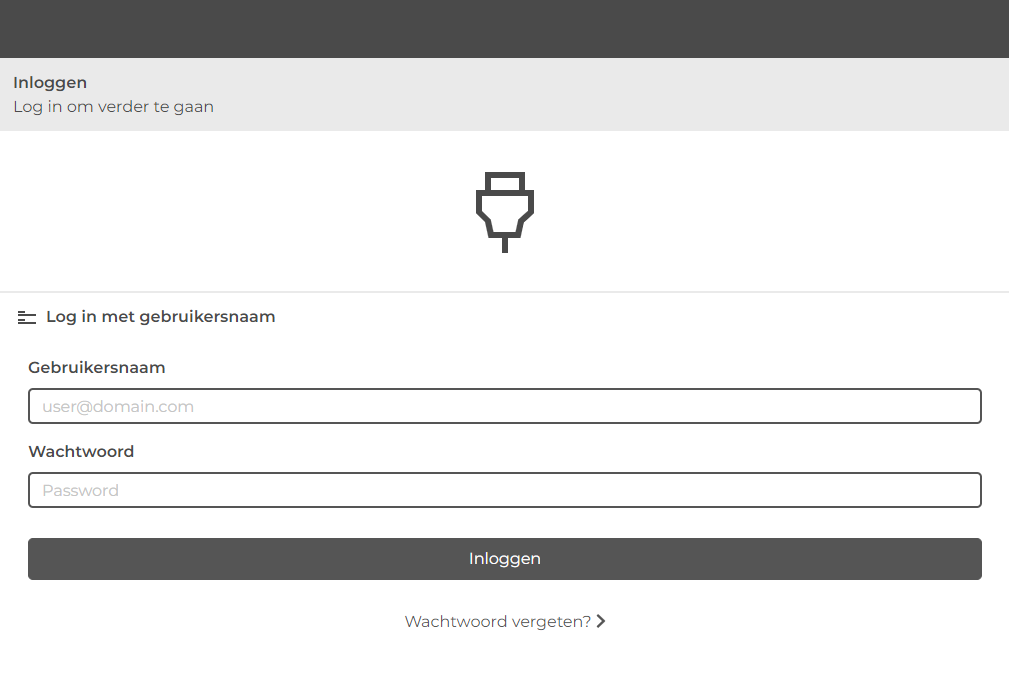
Step 3 - Login
Connect the EOBD plug of the remote to the car. The AutoNiveau Remote Diagnostics is only suitable for passenger cars with an EOBD plug and a 12V on-board network. Go to autoniveau.obd.help and log in with the given login name and username.
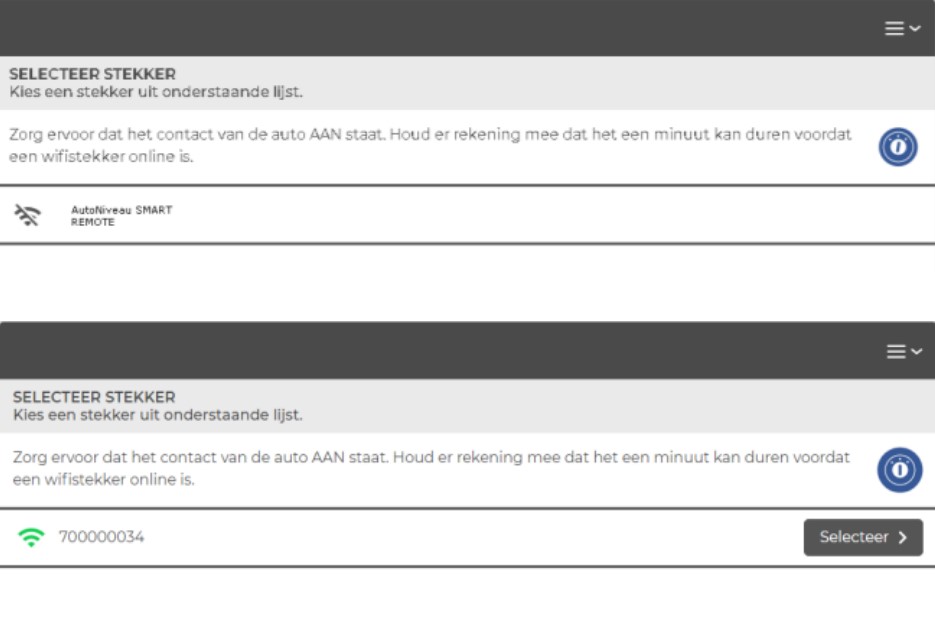
Step 4 - Select interface
If the correct login details have been used, the interface must be selected. Below are 2 examples, 1 where the Remote is not yet online. 1 where the remote has connection and can be selected. Also choose this option to request a ticket. It may take about 1 minute for the SMART interface to be online.
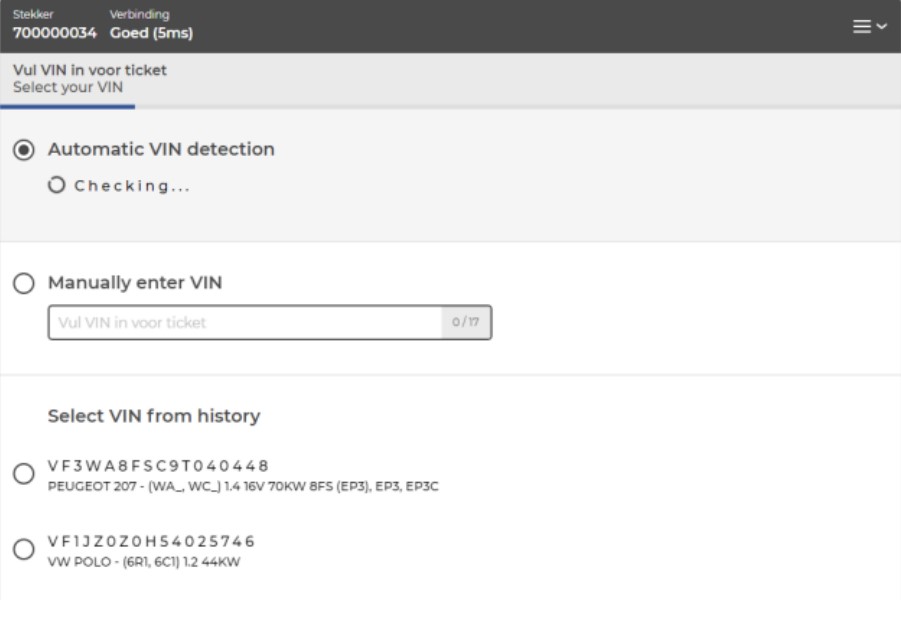
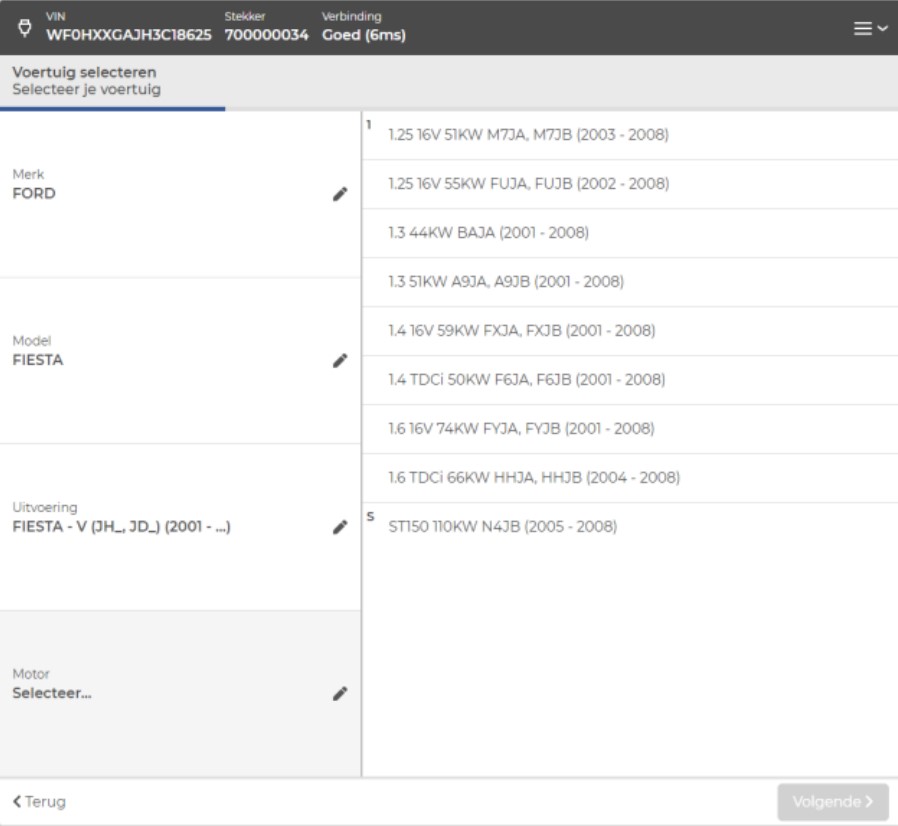
Step 5 - Select vehicle
Some chassis numbers are automatically read and the vehicle selected if possible. If this is not the case (or the chassis number is incorrect) you can enter the chassis number manually.
Then choose the correct options of the vehicle. You can proceed by pressing [Next].
Is the vehicle not in the app? Then contact the service center.
- ard@autoniveau.nl
- (088) 00 44 113
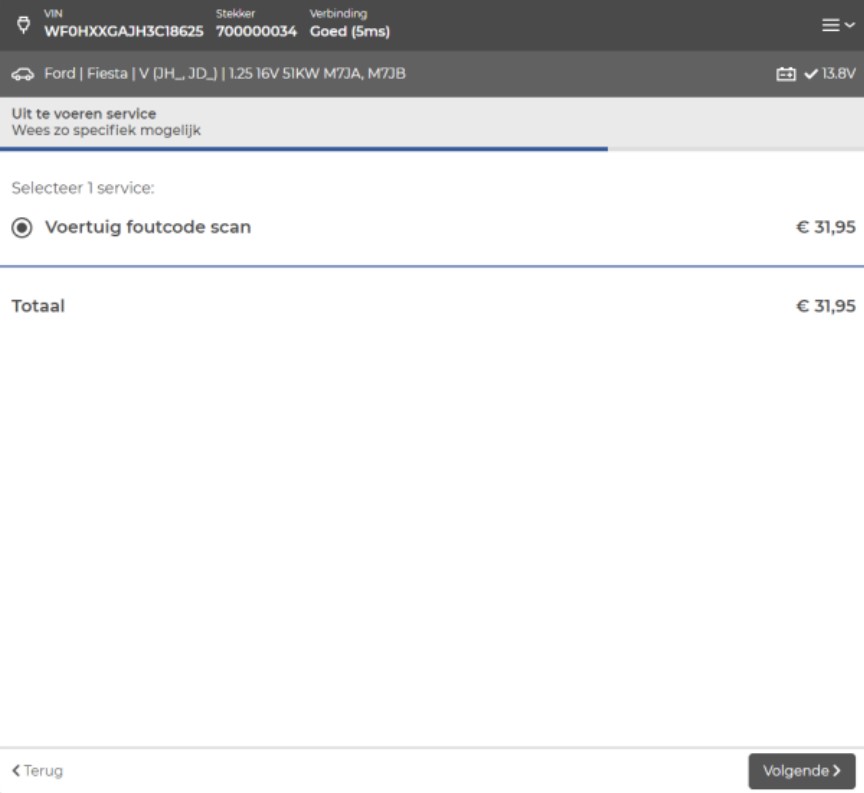
Step 6 - Select service
In this menu you can select the desired service. The app only shows the available services for the selected vehicle. To keep the menu clear, the available services are grouped. By pressing a group, the app shows the services in this group. The prices are also stated here. Select a service and press [Next] to proceed.
If you cannot find a service, you can select [Remote diagnostic support by AutoNiveau] under [Inspection] and indicate which service you want later in the chat. We will then select the right service for you. You can also use this menu to look up available services and prices in advance. A summary of the available services can also be found here.

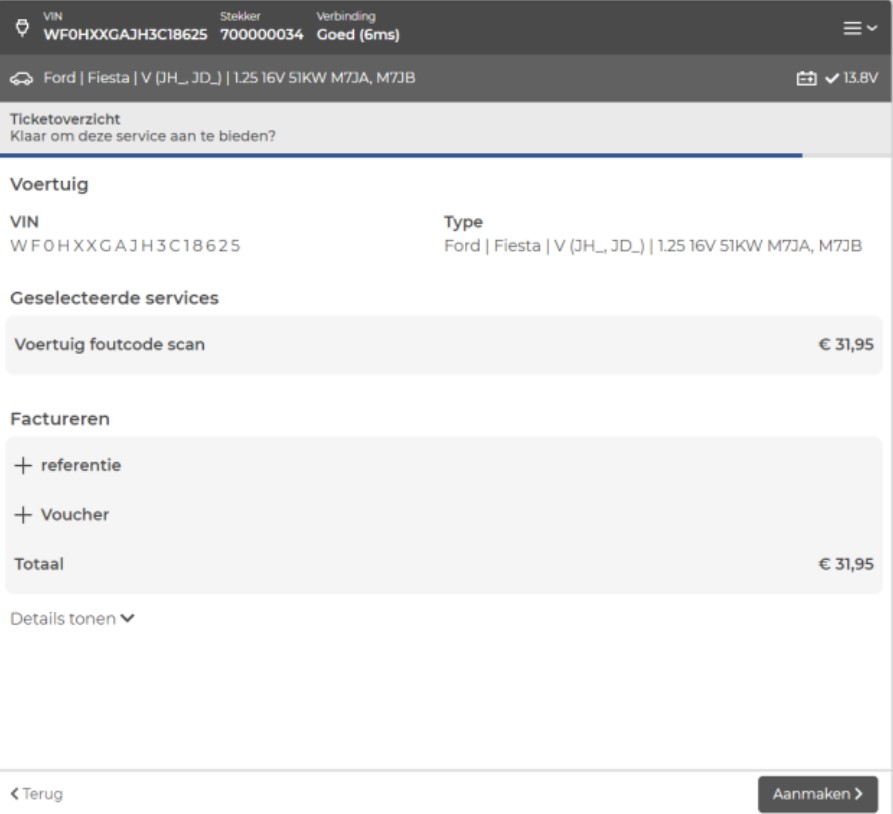
Step 7 - Overview and confirmation
Before the work takes place, the app provides you with a total overview of the data you have entered. Here you can check all data and change it if necessary. By pressing [Create] you send and approve the order to our service center. In this screen you can also enter an order reference or discount voucher. The order reference is also stated on the invoice. By entering the registration number here, it is immediately known to the employees of the service center.
Your request is now awaiting at our service center. Your request will be processed within a few minutes.
Step 8 - In progress
Your request is now being processed in our service center. An AutoNiveau Remote Diagnostics employee will contact you via the chat function. Through this chat your wishes will be discussed again and you will receive instructions if necessary. We strive to perform the service and to disrupt the other activities in the workshop as little as possible.
If it is necessary that an employee of the car company remains with the vehicle, the employee of the service center will indicate this during the chat conversation. In all other cases, the employee can perform other activities while the operator performs the desired shift.
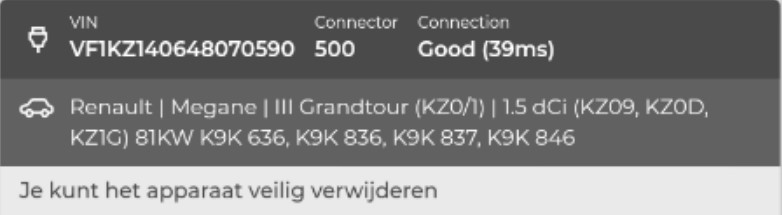
Step 9 - Completion
When the service has been performed as desired, the operator will complete the service. After this you can disconnect the remote from the vehicle. The accompanying invoice will be sent to you by email and the outstanding amount will be debited by direct debit.